Vyond tutorial
VYOND TUTORIAL
Then, you will have to select a style for your video.
You can also preview your video before the final product.
After watching these recommendations, you will be able to start working. You will need a title and you can choose to expand on it by adding further information below the title.
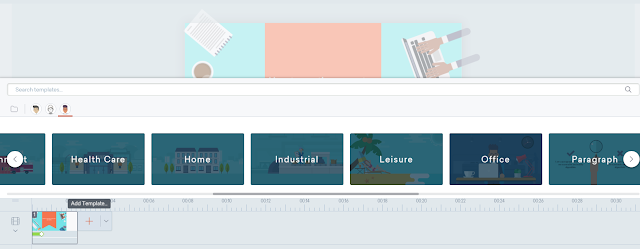
Here are the different scenarios available. By clicking on the + button, you can add templates.
Here you have text settings.
Here as you can see, you can add music from the tool or you can use your own music.
Here you can see the time duration which can be edited (there is a minimum of time for each template)
You can copy the link of your video in order to share it.

Vyond is the easiest way to create professional animated videos. Built forprofessionals of all skill
levels in all industries. No video experience required.
Vyond lets you create dynamic videos for any audience.
To begin with, you need to register op sign up in this website: https://www.vyond.com/solutions/
If you click on sign up, you will be able to create an account.
Here, you have to fill in with personal information and click on sign up for a free trial at the button.
You will get an e-mail that you need to open and click on the activate now link. If that link does not work, paste the link that it is below the activate now link into your browser and try again.
Luckily, you will get this confirmation that you have activated your account and you will be able to start creating a video by clicking on make a video.
Once you have sign up, you can log in by using a Gmail account as well.
Then, you will have to select a style for your video.
Then, you will be able to follow some recommendations from the tool:
You will be able to choose scenarios, characters, charts.
The templates are clips that will combine to make your video.
Here is a recommendation for the time duration of your templates.
You can also preview your video before the final product.
You can swap the templates as well.
After watching these recommendations, you will be able to start working. You will need a title and you can choose to expand on it by adding further information below the title.
Here you have the options to control the time for the templates.
Here you can see that you can add text (such as a title or sentence) to every template or not.
With these three options, you can bring your character/s to life by adding movement, feelings and even voice.
Here you have all the actions available for your character/s.
Here as you can see, you can add music from the tool or you can use your own music.
Here you can see the preview option from the start or from the template you are creating or editing.
Here you can see the time duration which can be edited (there is a minimum of time for each template)
Next to the preview button, you have the option of saving. You can save as many times as you wish.
Once you think you have finished, you can preview your video before saving it as a final video. Then you will see the following message.
Here you as you can see, you can click on your video and watch it as the final product.
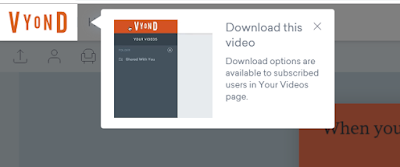
Finally, you will be able to watch your video and you will be able to share it, to rename it, to download it and/or share it as the following picture shows it.
You can copy the link of your video in order to share it.

There is a problem with this tool which is that users can have a free trial for fourteen days. Then, if they want to continue using the tool; they have to pay.


Comentarios
Publicar un comentario